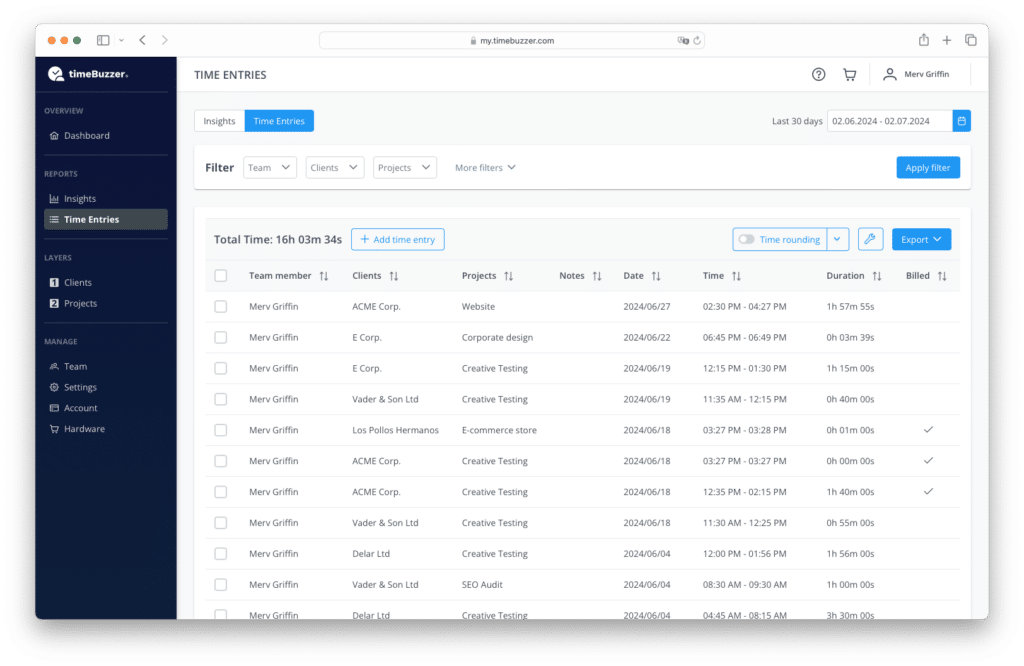
In this article you will learn more about the “Time entries” tab in timeBuzzer.

The “Time entries” tab shows you a detailed report with all time entries of you and your team and allows you to manage, filter and export them.
Video: How it works #
Filter time entries #
- Go to web console
- Navigate to “Time entries” page
- Select a date range
- Filter by layers and tiles (your clients, projects, tasks etc.)
- Filter by notes (Click checkbox once to filter time entries with a note, click checkbox twice to filter time entries without a note)
- Filter by billing status (Click checkbox once to filter time entries that you have already billed, click checkbox twice to filter time entries that haven’t been billed yet.)
- Filter by team members (Only visible to admins and managers in team accounts)
Add, manage and delete time entries #
- Go to web console
- Navigate to “Time entries” page
- Add new time entries manually
- Mark time entries as billed (You can also set several time entries to billed by marking several time entries, clicking on “Select action” and then on “Change billing status”.)
- Delete time entries
Create a PDF report #
- Go to web console
- Navigate to “Time entries” page
- Select date range
- Set and apply filters (Filters must be applied in order to have an effect on the export)
- Round time entries
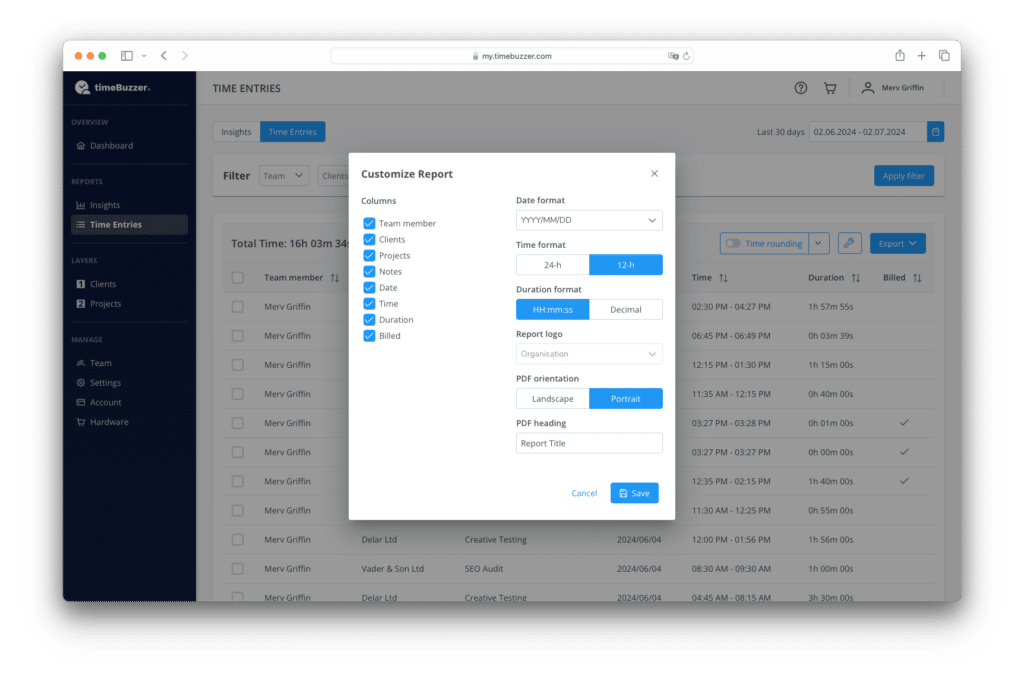
- Customize your report
- Click on “Export” and choose “Export PDF”

Export data (XLSX or CSV) #
- Go to web console
- Navigate to “Time entries” page
- Select date range
- Set and apply filters (Filters must be applied in order to have an effect on the export)
- Round time entries
- Customize your report
- Click on “Export” and choose “Export XLSX” or “Export CSV”

Customize reports #
- Go to web console
- Navigate to “Time entries” page
- Click on the Wrench symbol
- Adjust the settings
- Click “Save”

Here is an overview of the available settings:
Columns
Select which columns you want to display in your reports to decide what information you want to share with others.
Date format
Choose a different date format for your reports. (This only affects your reporting, not your general profile settings for your dashboard etc.)
Available formats:
DD.MM.YYYY
DD/MM/YYYY
MM/DD/YYYY
YYYY.MM.DD
YYYY/MM/DD
YYYY-MM-DD
Time format
Choose between a 24-hour and a 12-hour time format for your reports.
Duration format
Choose between the HH:MM:SS format or the decimal format for your reports. The decimal format (e.g. 1.5 hours) is particularly useful when exporting for further calculations with Excel etc.
Custom logo
Upload a custom logo to your account that you can use for your PDF reports. (It will replace the default timeBuzzer logo) In team accounts only an administrator has the permission to upload a custom logo.
PDF orientation
Choose between “Landscape format” and “Portrait format” for your PDF reports.
PDF heading
Give your PDF reports an individual title.
Team privacy #
Only administrators and managers can view, filter and export team member data. Detailed report data from regular users is limited to their own data. Learn more about roles and permissions.
Let me know if you’d like this packaged for download or translated into German.