
In this article, you’ll learn how to connect timeBuzzer with Lexware Office to automate invoicing.

Connect timeBuzzer to Lexware Office #
- Log in to the timeBuzzer web console.
- Open the Settings.
- Select Integrations.
- Search for Lexware Office in the list and click Connect.
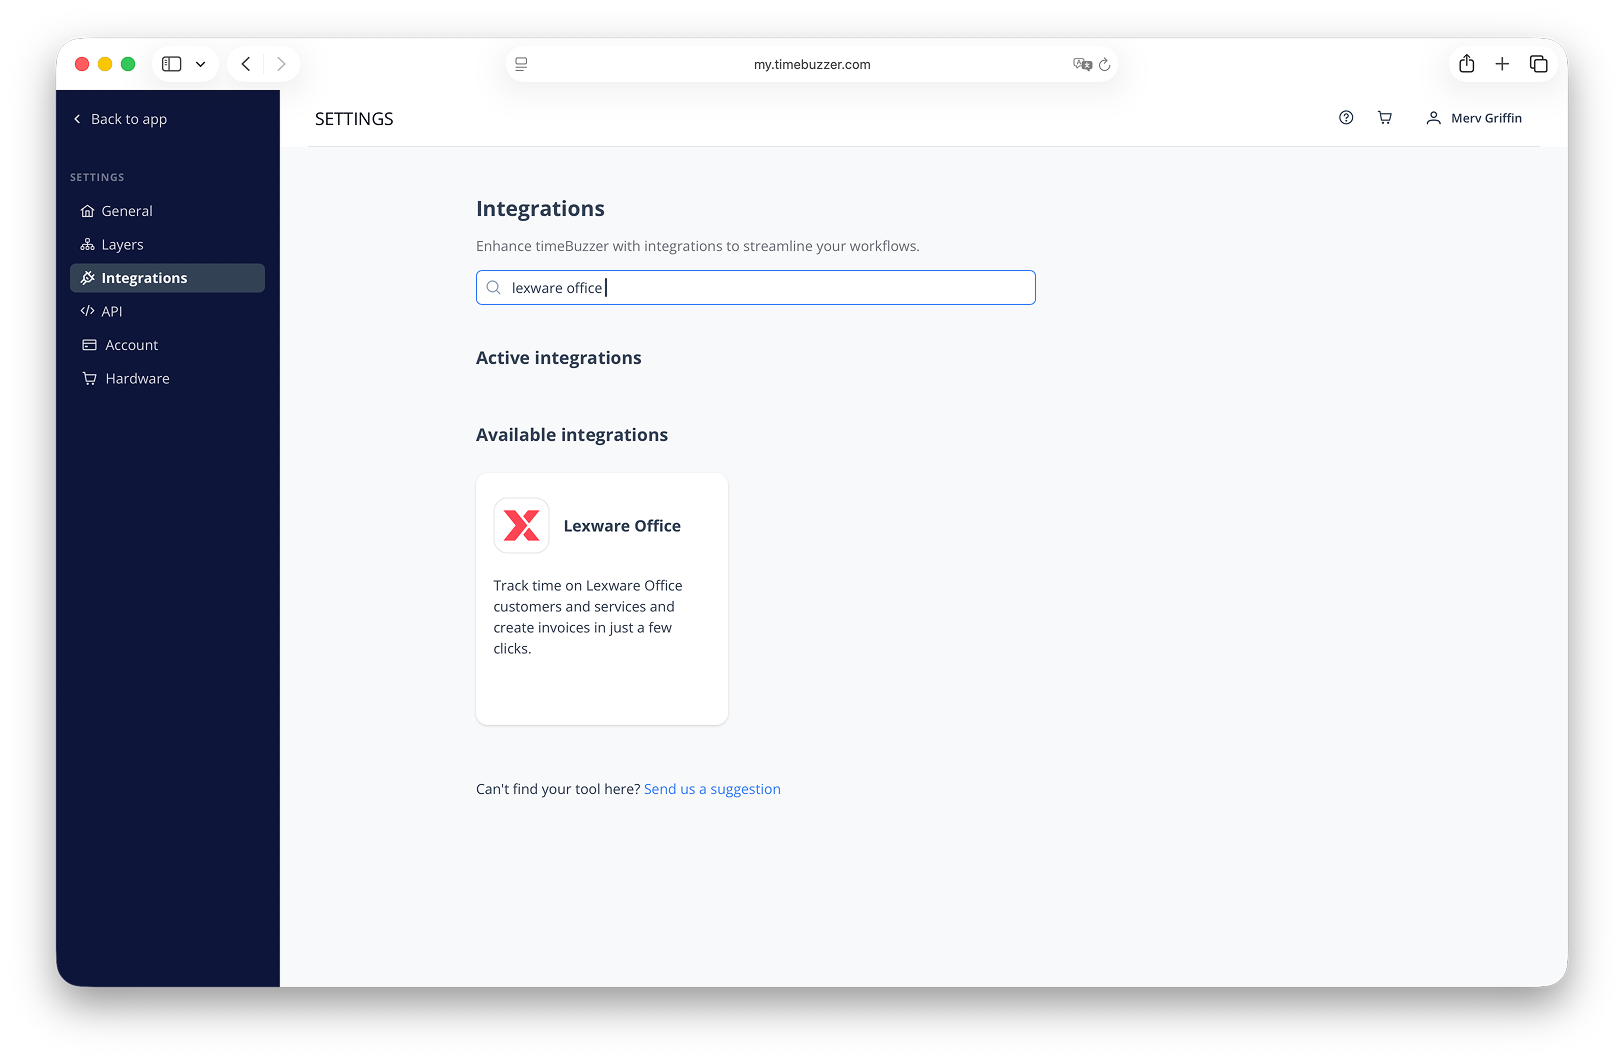
- You will be redirected to the Lexware Office login page.
- Log in with your Lexware Office credentials.
- Click Allow access to authorize the integration.
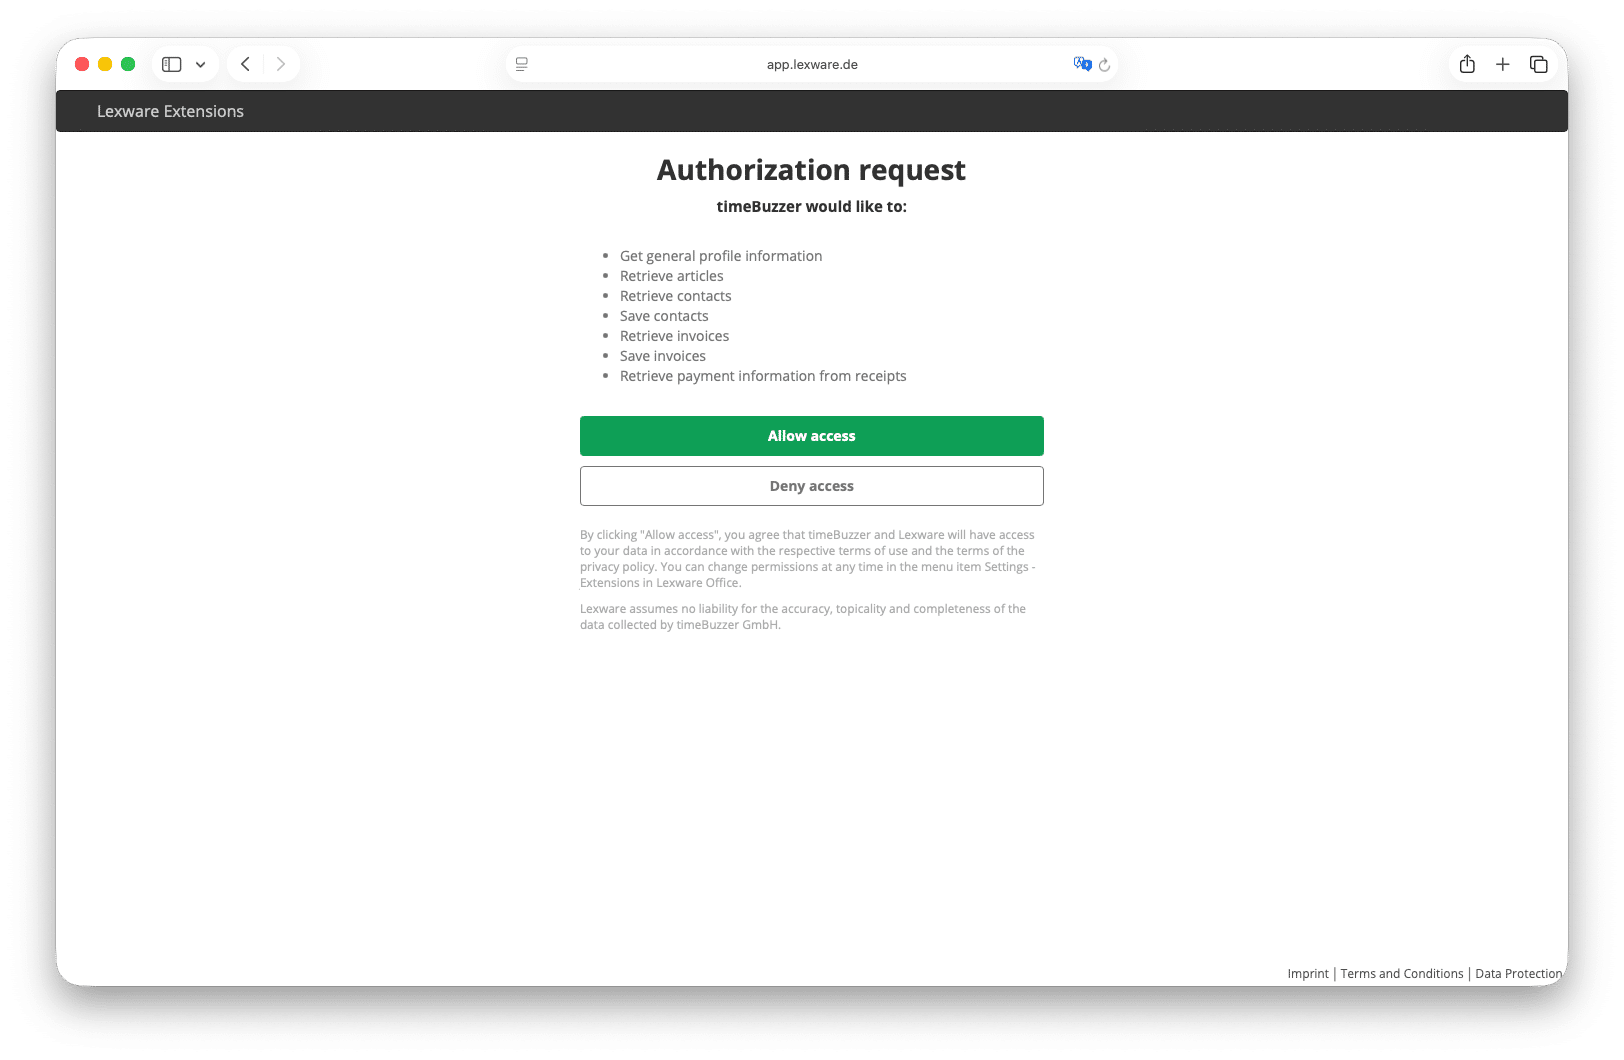
Your timeBuzzer account is now connected to Lexware Office!
Importing customers from Lexware Office #
You can import Lexware Office customers into any timeBuzzer layer.- Go to the layer to which you want to import customers.
- Click on Import.
- Select Lexware Office → Customers.
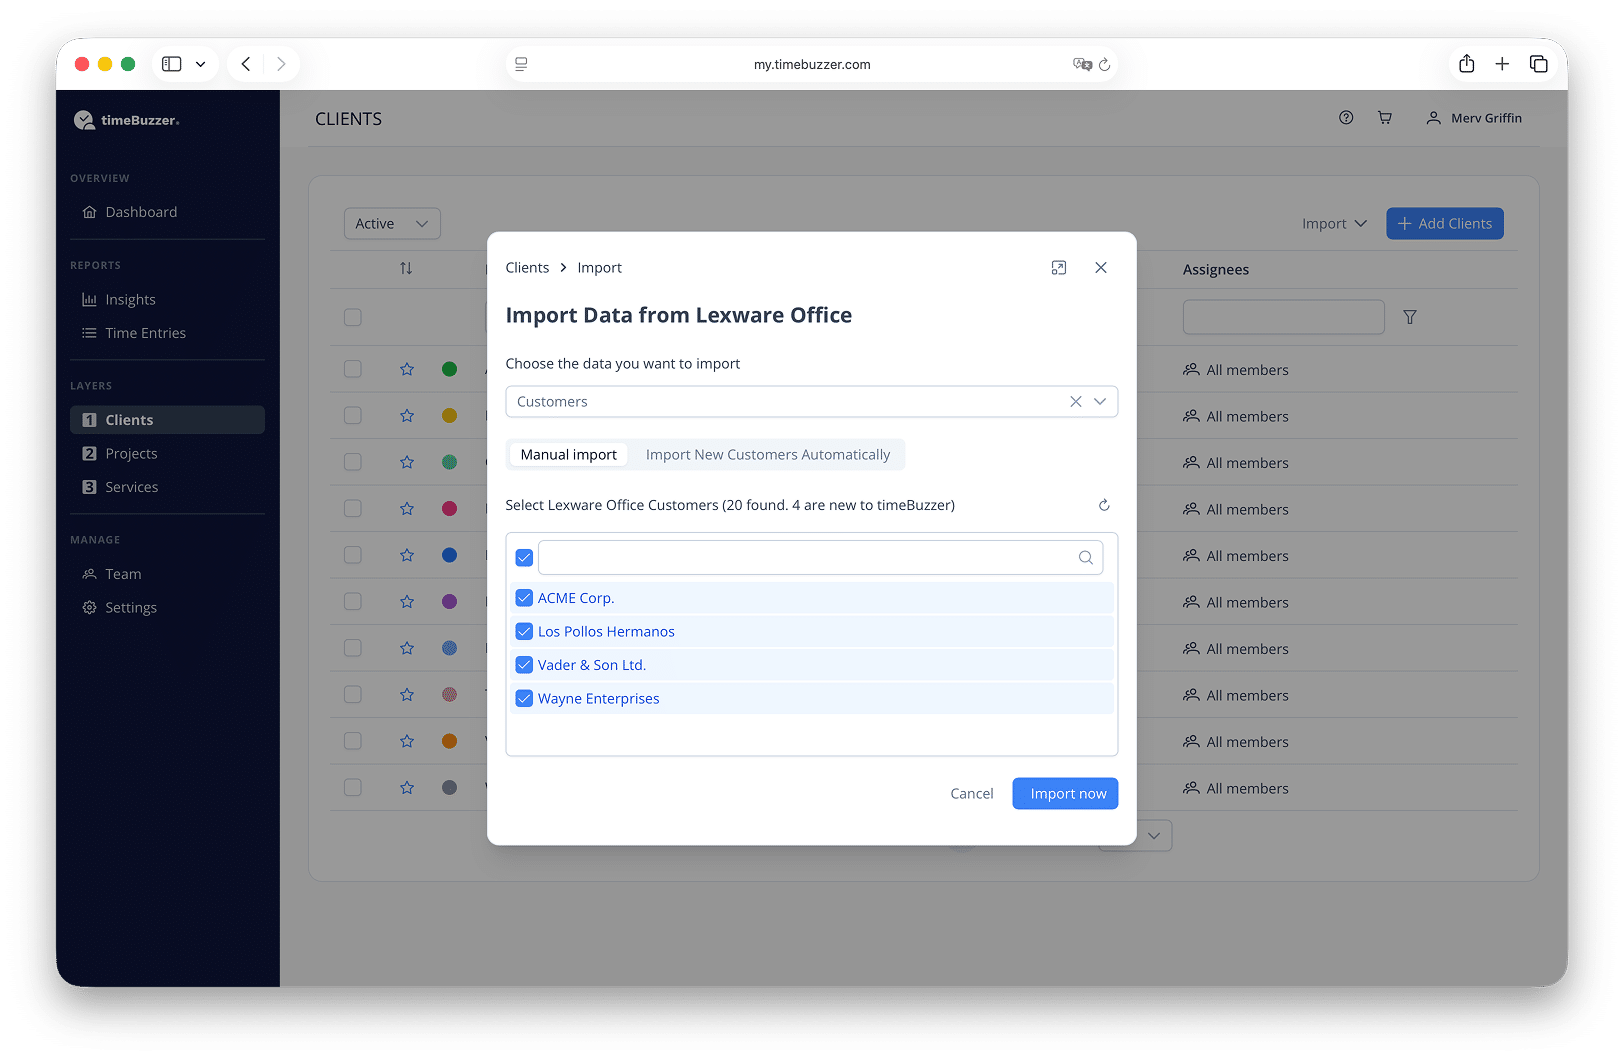
- Select the customers you want to import.
- Only new customers that do not yet exist in timeBuzzer are displayed. The system checks whether there are already customers with the identical name.
- Click on Import.
- Done. The imported customers will appear in your list with an external link that takes you directly to the respective customer in Lexware Office.
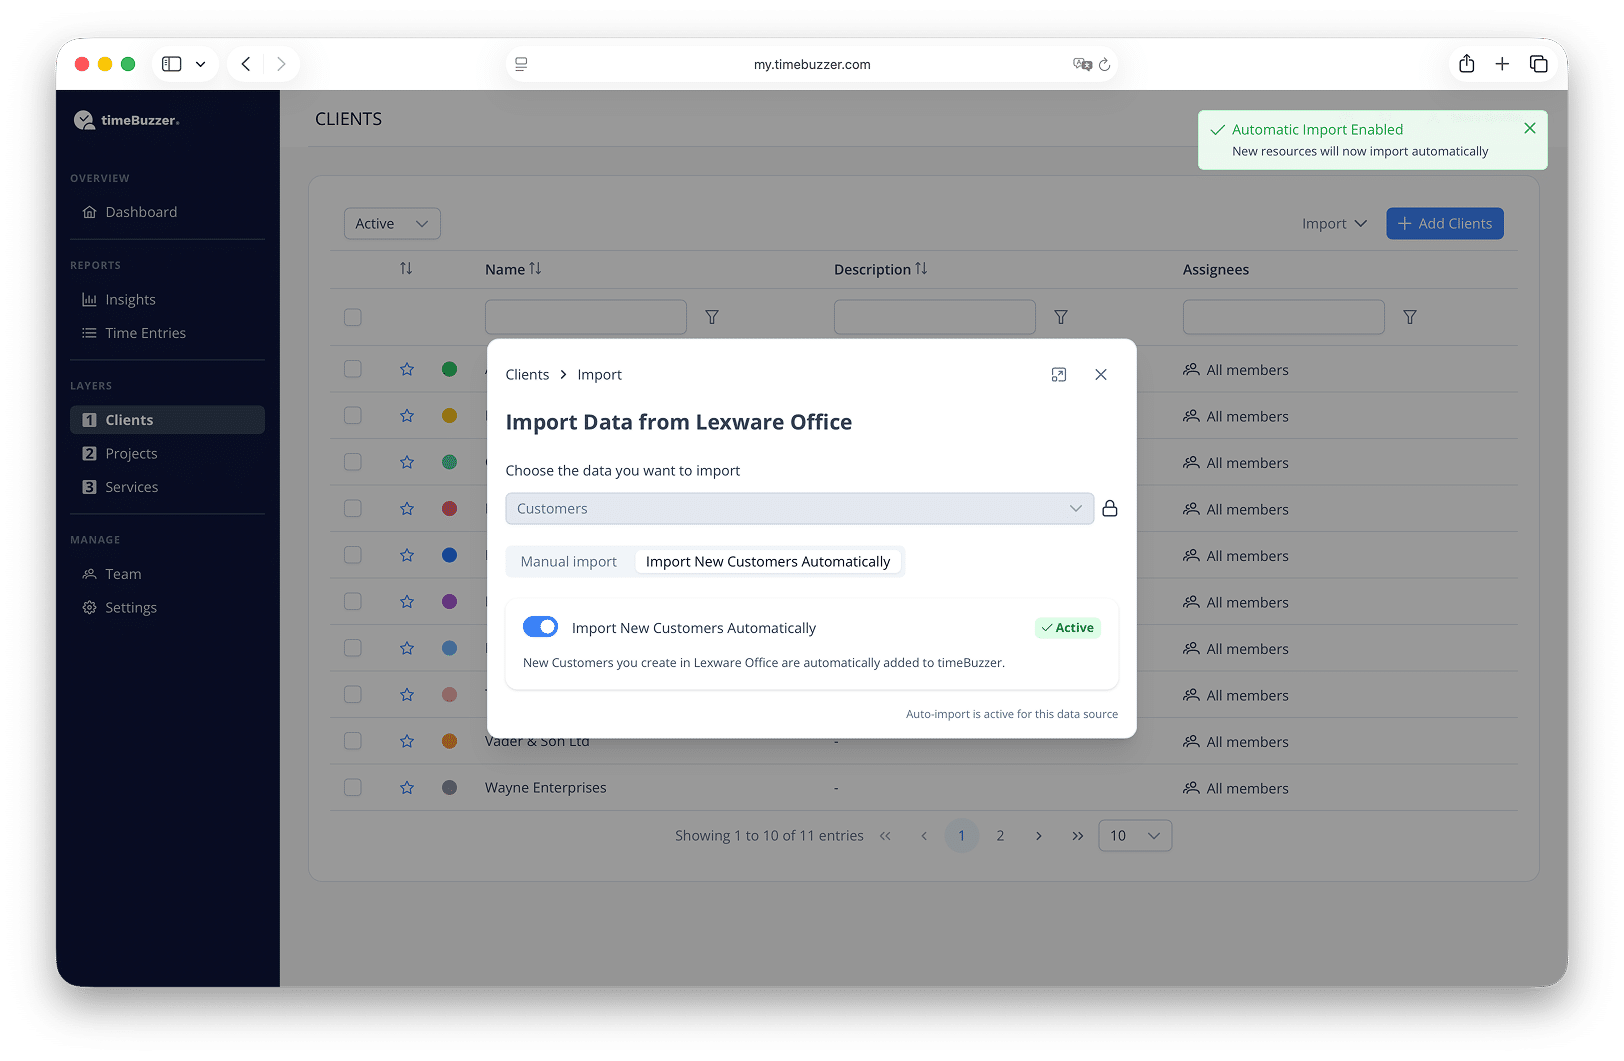
You can also enable automatic import, to automatically add new customers as they’re created in Lexware Office.
- Click on Import New Customers Automatically.
- Enable Automatic Import.
Import services from Lexware Office #
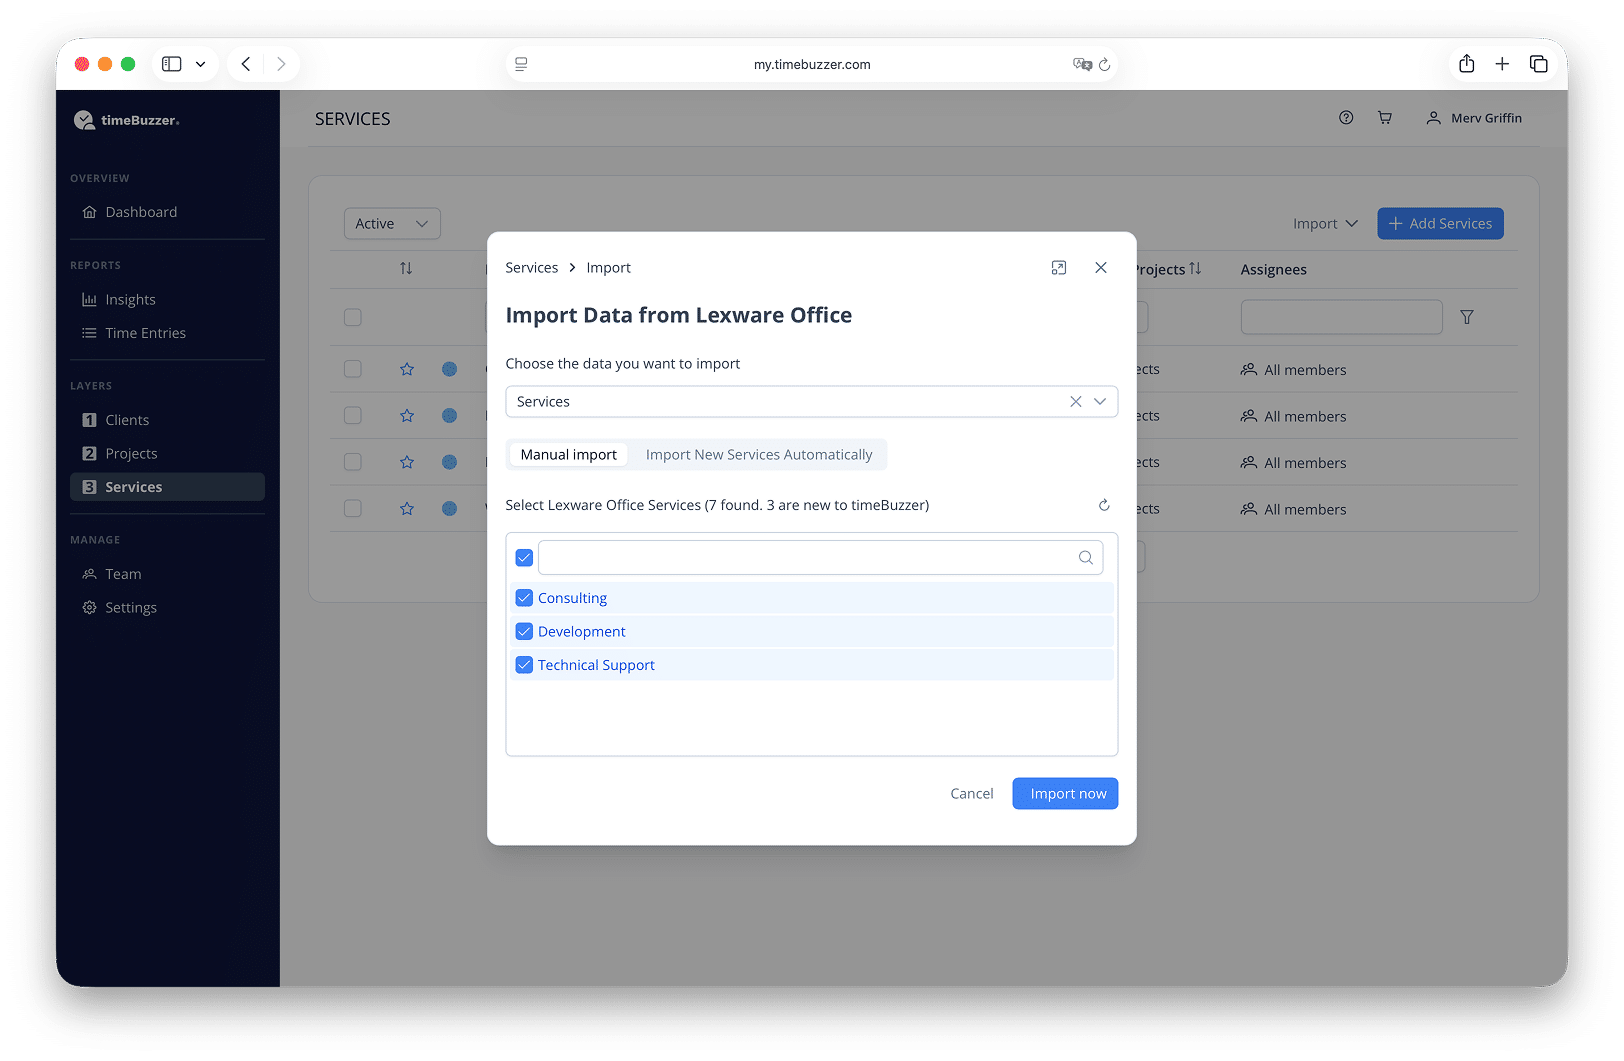
You can also import Lexware Office services into any timeBuzzer layer.- Click on the layer into which you want to import services.
- Click on Import.
- Select Lexware Office → Services.
- Select the services you want to import.
- Note: Only new services that do not yet exist in timeBuzzer are displayed. The system checks whether services with identical names already exist.
- Click on Import.
- Done. The imported services will appear in your list with an external link that takes you directly to the respective service in Lexware Office.
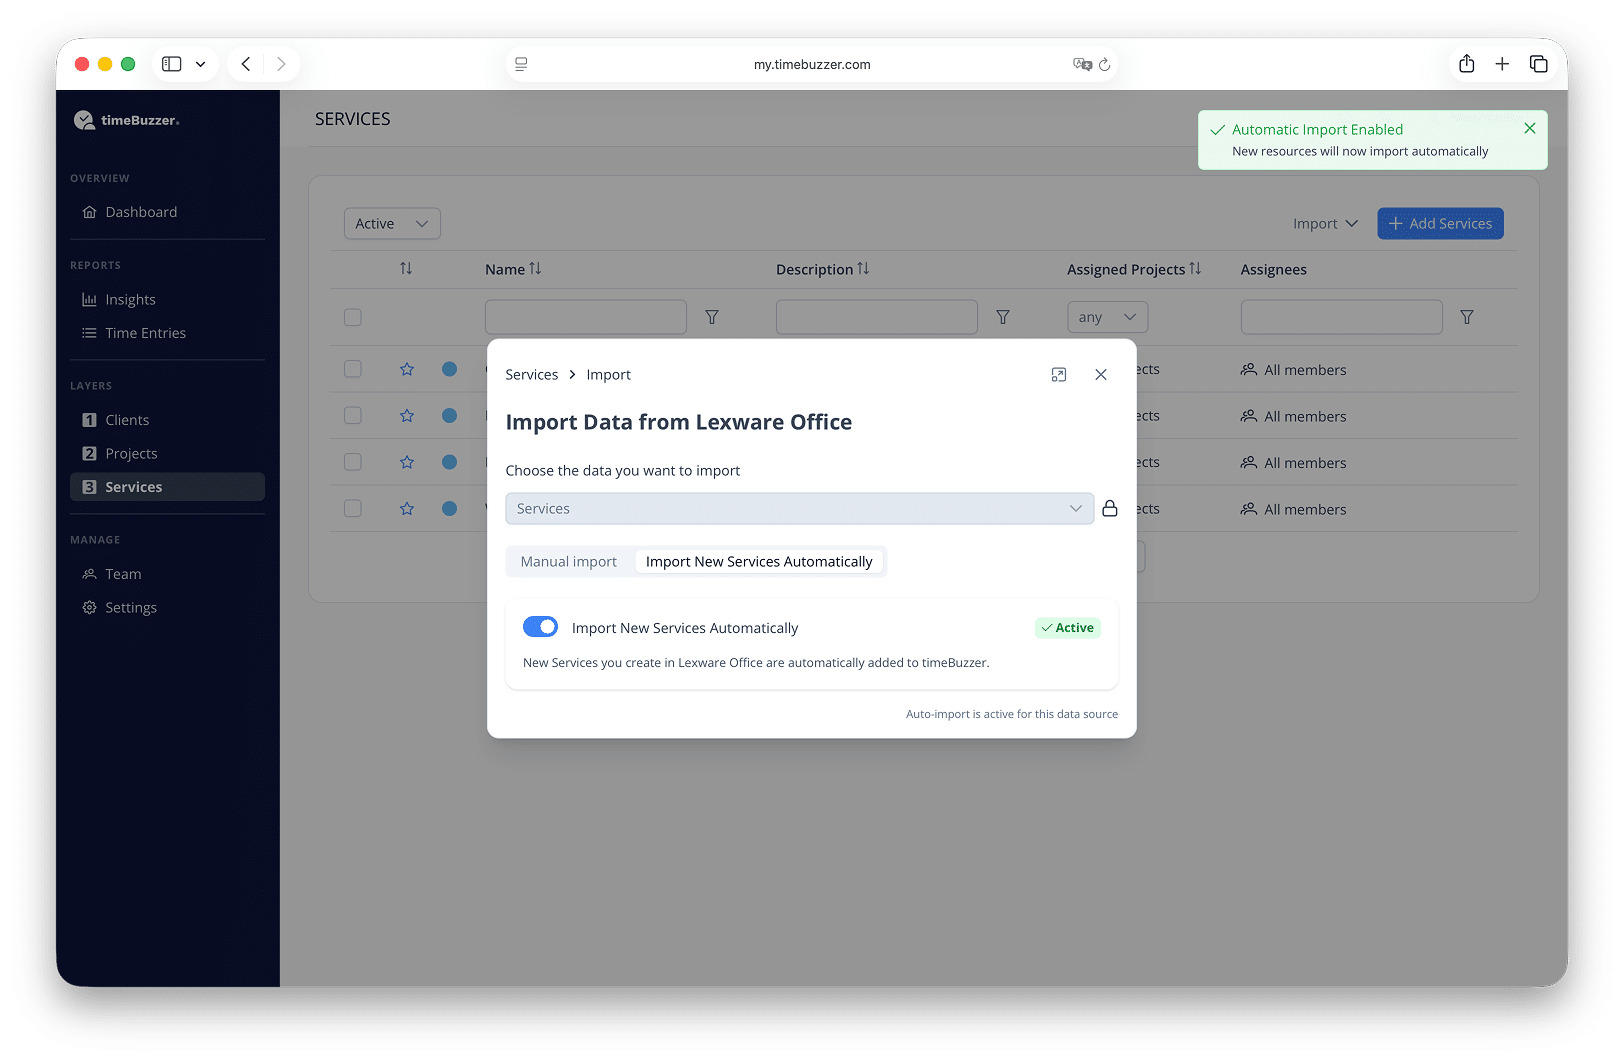
You can also enable automatic import, to automatically add new services as they’re created in Lexware Office.
- Click on Import New Services Automatically.
- Enable Automatic Import.
Create Lexware Office invoices directly in timeBuzzer #
- Go to Time Entries in timeBuzzer.
- Select the time period for your invoice (this defines the service period).
- Apply filters or select specific time entries.
- (Optional) Activate time rounding if you want to round time entries for the invoice.
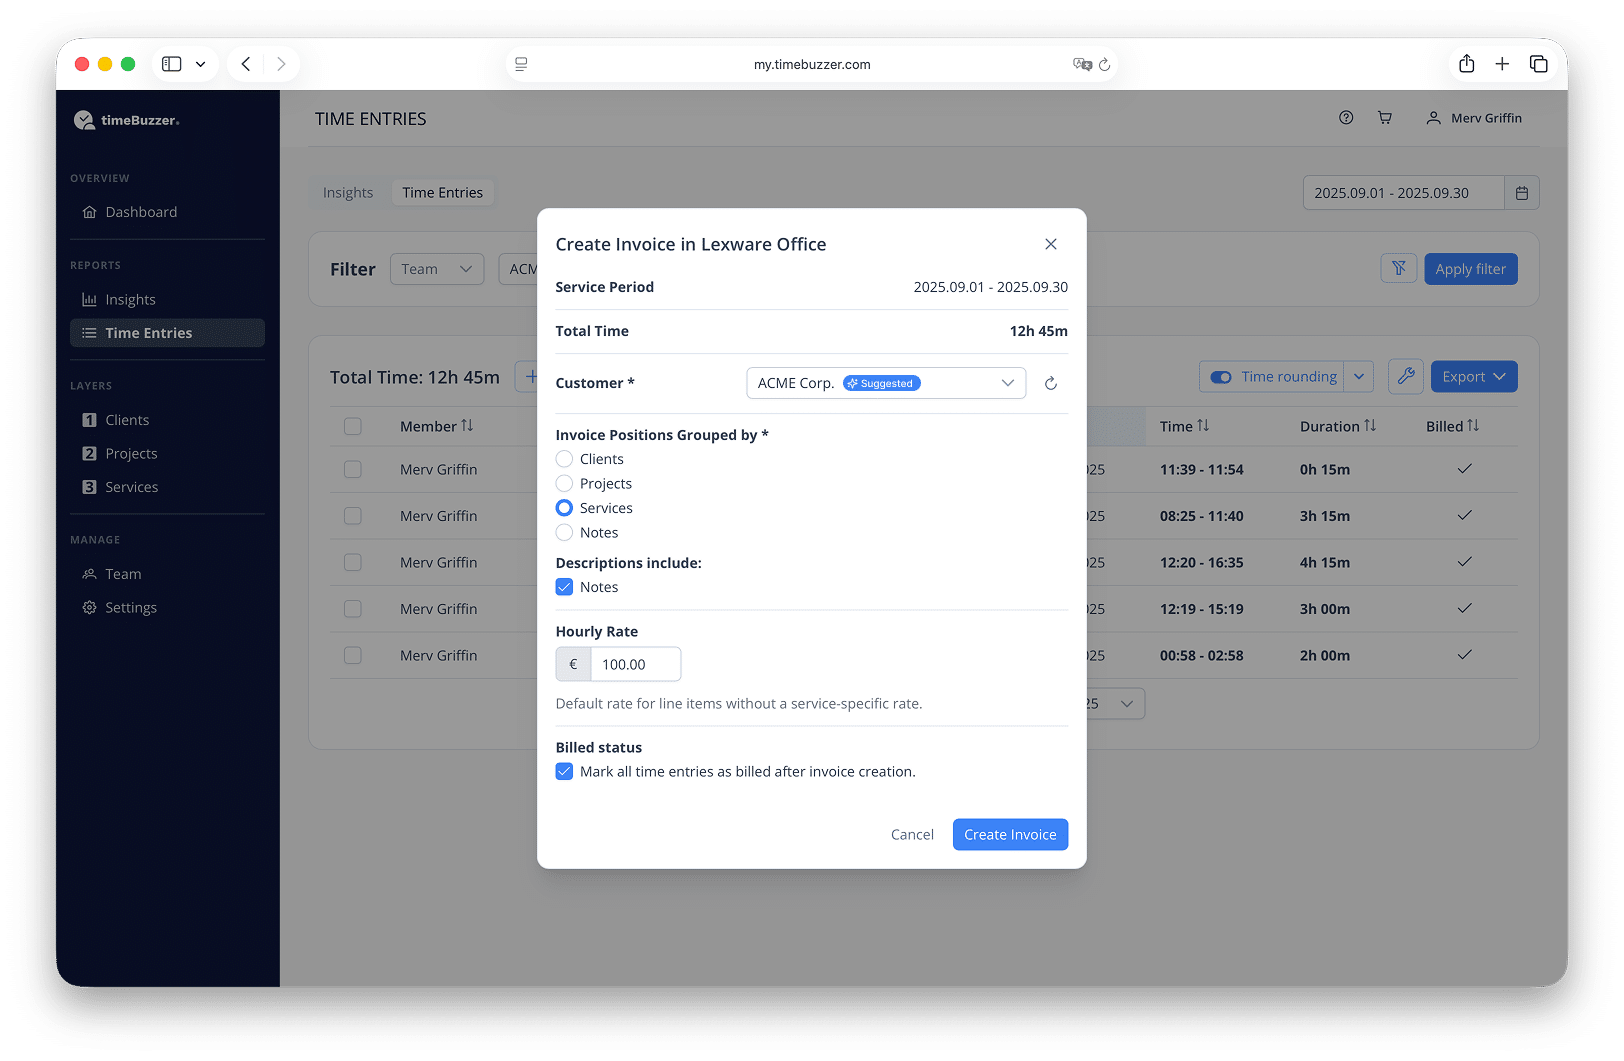
- Click on Export.
- Select Lexware Office as the export option.
- Continue with the suggested contact based on your filters or manually select your Lexware Office customer to create an invoice for. The contact must have an address in order to create an invoice for it.
- Select how the time entries should be grouped (by layers or notes).
- (Optional) Transfer notes from the time entries to the invoice description. Identical notes are combined.
- (Optional) Set the default hourly rate.
- Note: If you have hourly rates defined for your services in your accounting tool and you group by the layer in which you have imported that services, those hourly rates, currencies, taxes and units will be automatically applied.
- (Optional) Activate Mark as billed to automatically mark time entries after the invoice has been created.
- Click on Create invoice.
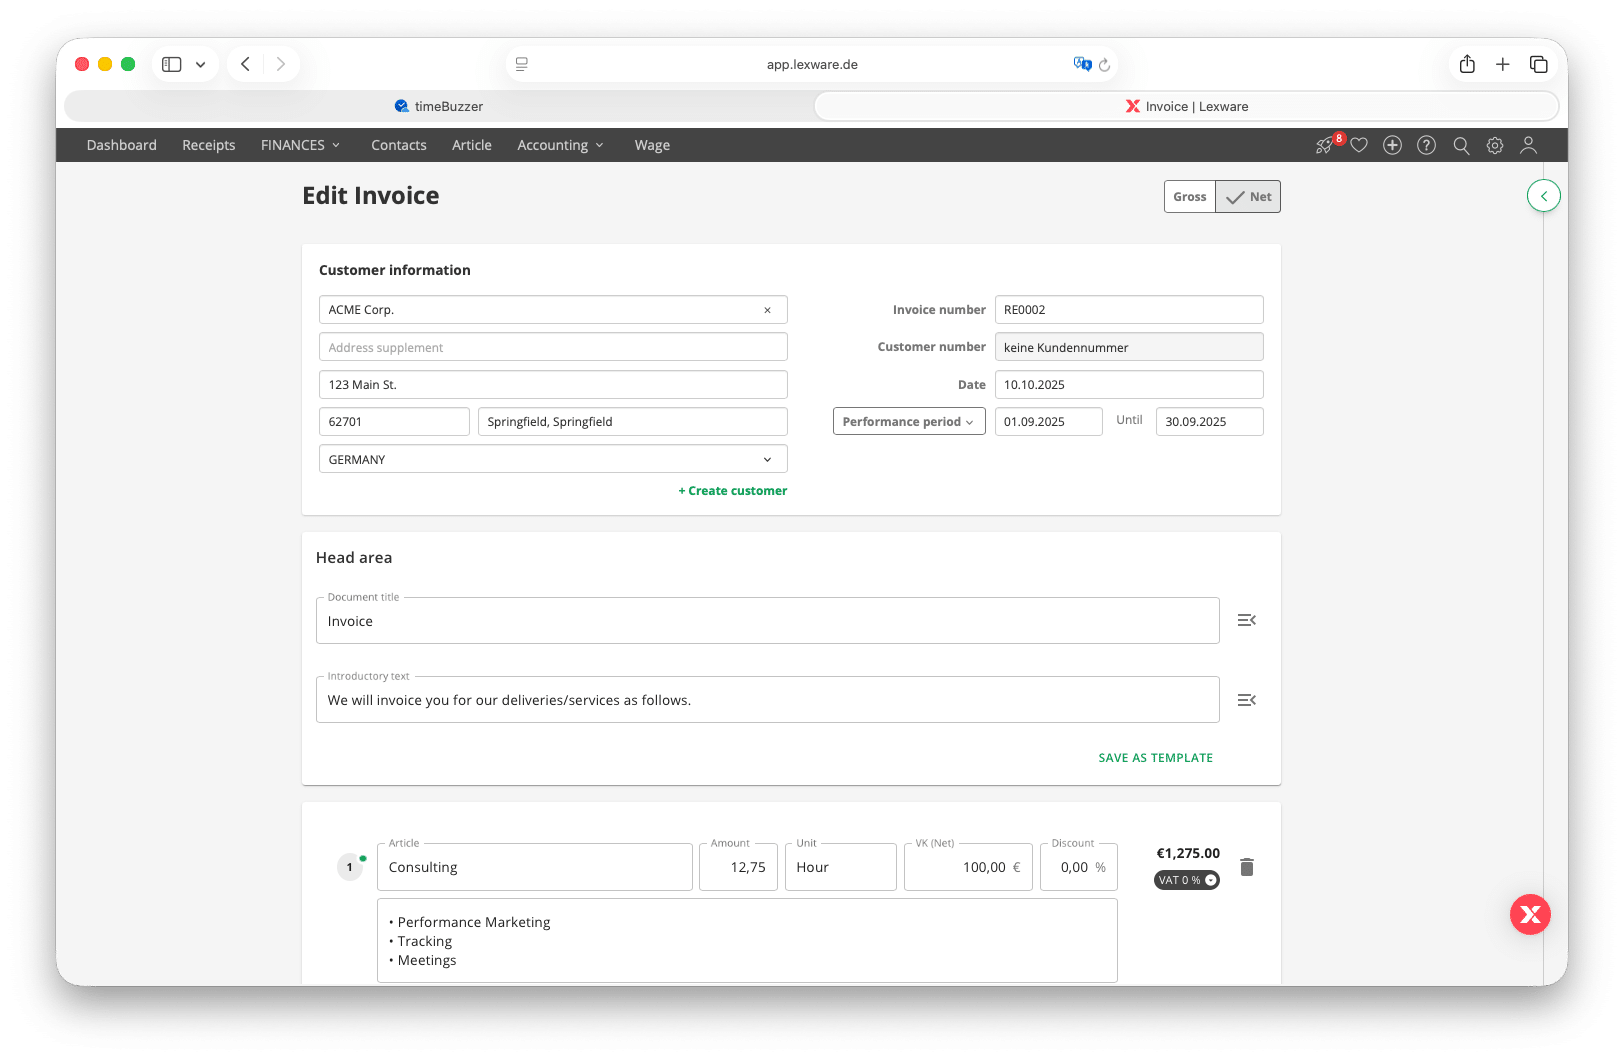
- Select Show invoice to open it in Lexware Office (opens in a new tab).
- Check and edit your pre-filled invoice.
- Click Preview and then Send.
- Done!
Define custom billing units #
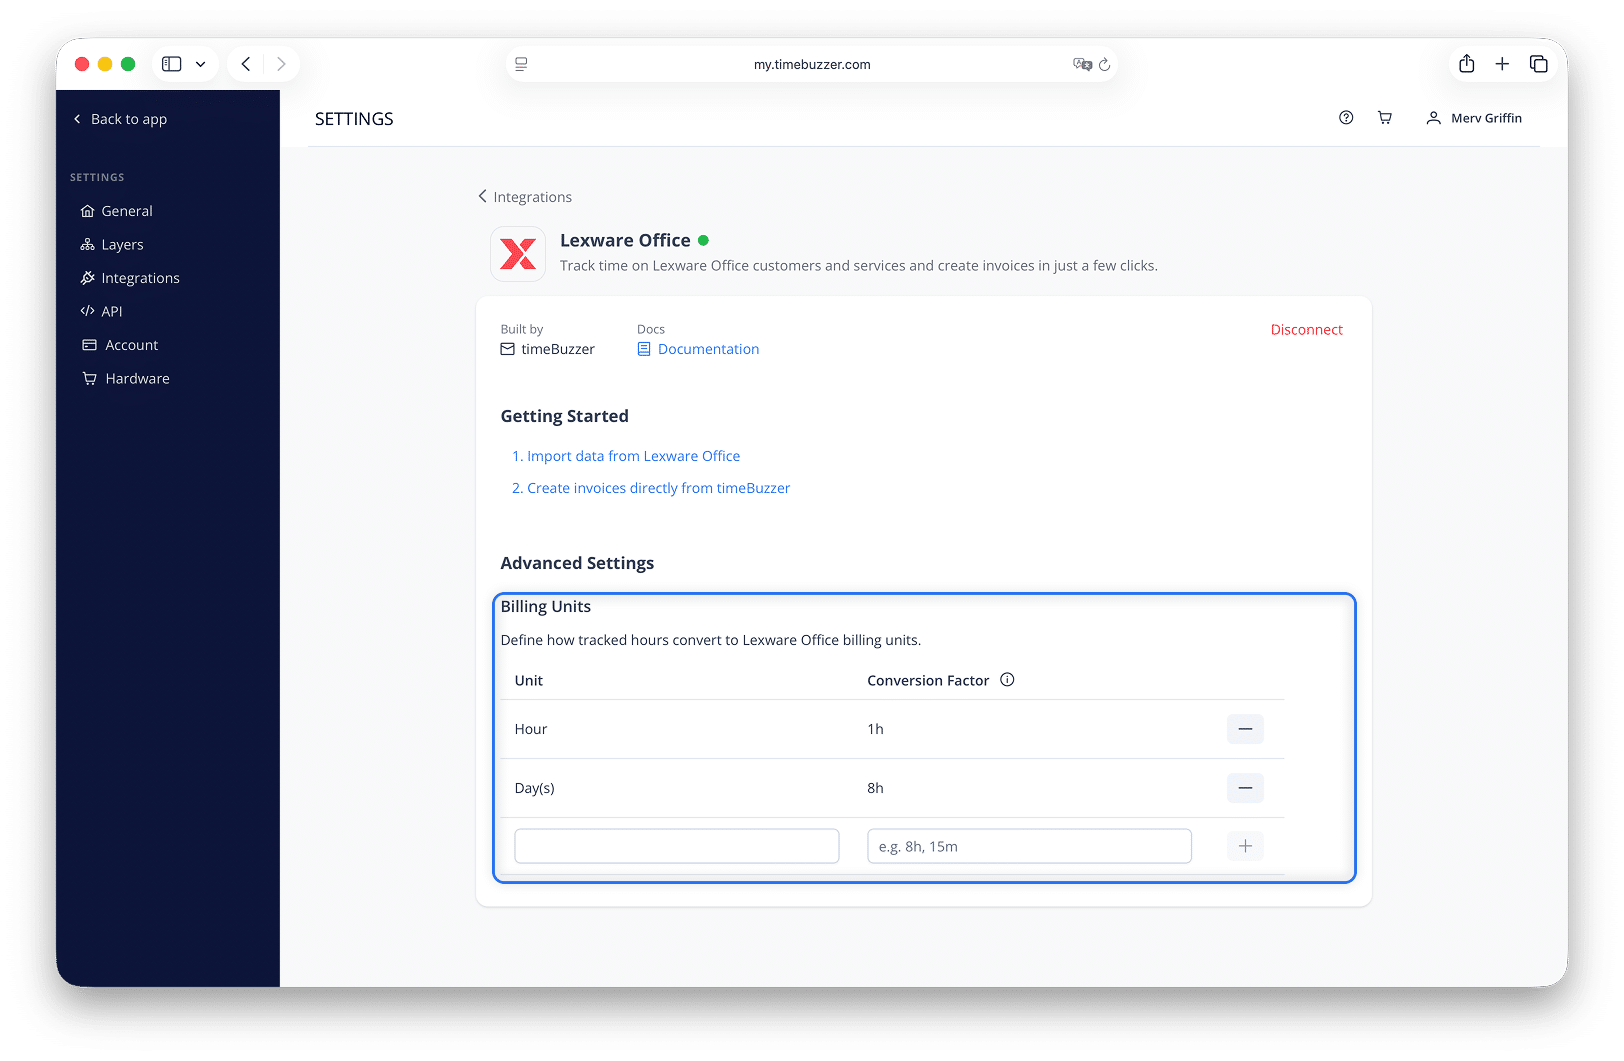
timeBuzzer tracks time in hours. If you bill some services differently in Lexware Office, add a custom unit with a conversion factor.
Examples:
- You bill a service by the day. Add the unit “Day(s)” with a conversion factor of 8h.
- You bill in 15-minute increments. Add the unit “Work unit” with a conversion factor of 15m.
timeBuzzer converts your tracked hours automatically when you create an invoice.
Requirements:
- The unit must also exist in Lexware Office.
- You need to use services in Lexware Office, and import and connect them in timeBuzzer.
- When generating the invoice in timeBuzzer, group by “services”.
You can set different units for different services.
FAQ #
What do I need to use the integration?
You need a timeBuzzer Pro account and a Lexware Office account with a plan that supports partner integrations and writing invoices.
Which layer structure in timeBuzzer is recommended?
As Lexware Office is structered in contacts and services, we usually recommend to use two layers with “contacts” in the first and “services” in the second layer.
However, generally you can import both customers and services into any layer. This allows you to tailor the integration perfectly to your individual structure.
Can I invoice Lexware Office customers without importing them?
Yes. Import and export work independently, so you can invoice Lexware Office customers with tracked time even if you haven’t imported them into timeBuzzer.
This is useful if you don’t structure timeBuzzer by customer, for example if you only track by project. You can still assign your tracked time to a Lexware Office customer when creating the invoice.
How does automatic import work?
Automatic import will automatically transfer future customers or services created in Lexware Office to the selected layer in timeBuzzer.
If you want to import existing customers and services, you can do so using the manual import function.
Who can use the integration?
Only users with the Administrator role can create Lexware Office invoices or import Lexware Office customers and services in timeBuzzer. Managers and regular users do not have access to these functions.
Which contacts are imported?
All contacts in Lexware Office that are marked as Customer or Customer / Supplier are available for import into timeBuzzer. Contacts that are marked exclusively as Supplier are not transferred.
The import of collective customers is currently not supported.
Which article types are imported?
All articles in Lexware Office that are marked as service are available for import into timeBuzzer.
Hourly rates, currency, taxes, and units are automatically applied to the invoice line items as defined in Lexware Office.